

A visual merchandising audit checklist helps store teams compare windows, displays, product presentation, and signage with the current brand brief. A useful audit records what meets the standard, what needs changing, who owns the correction, and the photos needed to confirm it.
Use the checklist for fashion and specialty retail stores, then adapt it to your format. It follows Bitreport’s existing template: 37 checks across eight areas, plus six photo-record fields. You can download the PDF or request the editable Excel version.
Download the free visual merchandising audit checklist PDF, or open the template library to request the editable spreadsheet.
What should a visual merchandising audit cover?
Start at the storefront and follow the customer’s route through the store. Compare each area with an approved reference: the campaign brief, floor plan, styling guide, pricing instruction, or store presentation standard. A statement such as “display looks good” is too subjective to produce consistent reviews across locations.
The audit covers presentation and its immediate dependencies: featured product availability, clear routes, working lights, tidy fitting rooms, and accurate signs. It is one part of retail operations. A wider retail audit also covers areas such as cash handling, security, and operational controls.
This checklist is written for fashion and specialty stores. A grocery store can replace mannequin and fitting-room checks with the relevant shelf, endcap, and display checks. Keep the question tied to an observable standard rather than marking an irrelevant section as a failure.
Prepare the brief before the store walk
Record the store, audit date, auditor, store manager, and campaign or season. Attach or reference the approved brief version. Note any authorized local variation, such as a smaller feature table or a different fixture layout. Without that context, two reviewers can reach different conclusions about the same display.
For help creating the brief, our fashion retail visual merchandising guide includes a worked campaign example and ways to adapt it to different store formats.
Agree on three results before starting:
Pass: the checked item meets the applicable standard.
Fail: the item does not meet the standard; record the gap and the next action.
N/A: the item does not apply to this store or campaign; explain why.
Do not use N/A when you cannot find a product, have not checked an area, or are waiting for a replacement sign. Those are unresolved checks or findings. Leave an unperformed check visibly incomplete and finish it before reporting a complete audit.
Name the person who will review the photos and the person responsible for corrections. This can be a store manager and a regional VM reviewer, depending on the size of the network.
The visual merchandising audit checklist
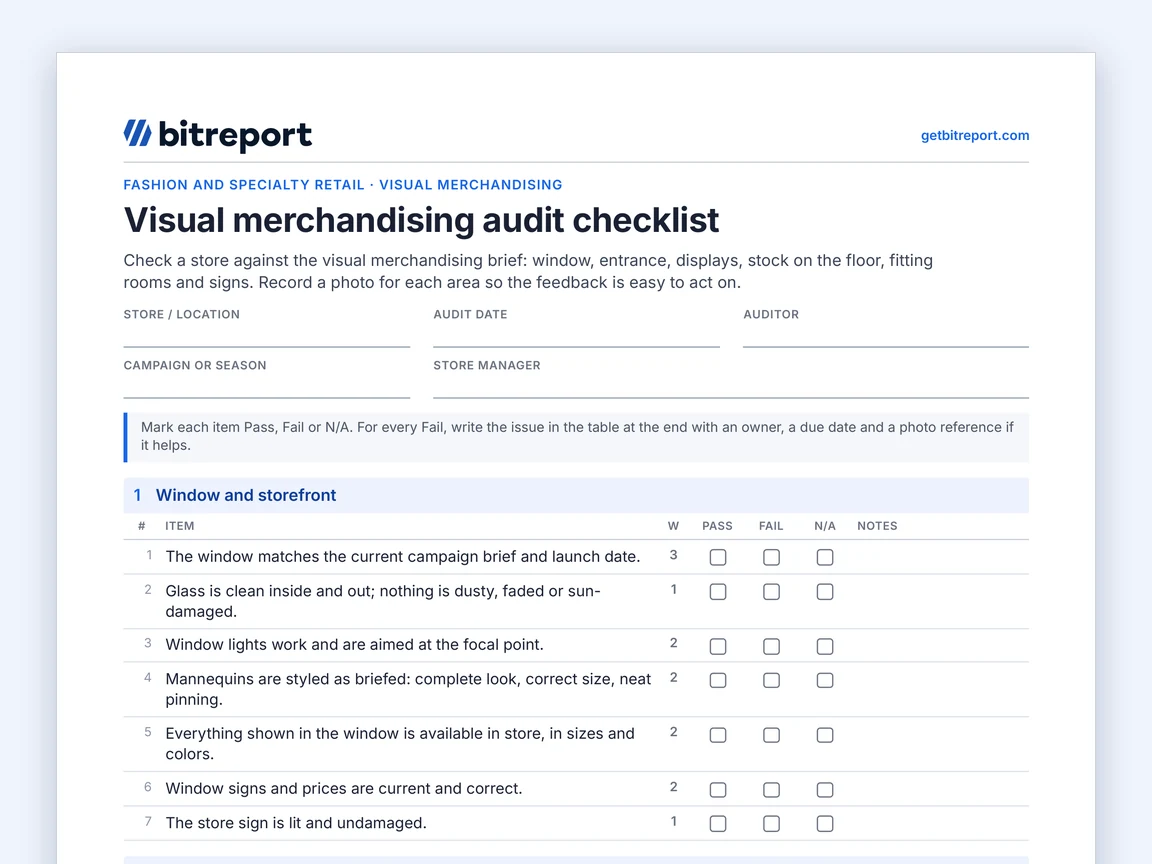
The template has 37 weighted checks in eight areas, plus six photo fields that document the audit but are not scored. The full list is in the PDF and the editable Excel. What follows is how to use it so the results can be trusted.
Five mistakes that make a VM audit unreliable
Scoring against opinion. “Display looks good” gives a different result for every reviewer. Point each check to a reference: the brief, the floor plan, or the styling guide. “Stack height meets the guide” works only if the guide states the height.
Photographing the wrong angle. A close-up of folded product cannot show whether the hero display is visible from the door. Shoot from the customer’s viewpoint and repeat the same framing for the “after” photo.
Mixing up a display gap with a supply problem. If the stock is in the backroom, it is a replenishment task. If it does not exist, record it and ask for a display decision.
Treating a price sample as proof. Ten checked prices show a pattern, not that every price is right. Include featured products and different zones, and widen the check when you find errors.
Waiting for the score on a safety issue. A blocked route is fixed through the store’s safety procedure straight away. This checklist does not replace a safety assessment.
Capture six photo views that a reviewer can use
The template includes six evidence fields. Use them consistently so a reviewer can compare the same areas over time:
Window: a straight-on view showing the complete display.
Entrance and hero display: a wide view showing the customer’s first impression.
Main wall or feature fixture: enough context to check grouping, gaps, and placement.
Mannequin styling: the full outfit, with a detail photo if a small correction needs explaining.
Fitting rooms: an empty area showing the relevant presentation checks, where photography is permitted.
Anything that needs fixing: a context photo and, when useful, a close-up of the issue.
Attach each photo to its store, zone, audit date, and campaign. Follow the same framing on the correction photo. A tight “after” crop can hide a problem that was visible in the original wide view.
Use enough light to see the issue clearly and avoid including customers or personal information. Do not ask a reviewer to judge an entire wall from an image that shows only one shelf. Equally, do not collect ten similar photos when one clear view answers the check.
Score the audit without hiding unfinished work
The template uses weights of 1, 2, and 3 for normal, important, and critical checks. These are template priorities, not an external certification standard. Review them against your own brand brief before rollout and use the same version when comparing stores.
The PDF and spreadsheet use this calculation:
Weighted score = Pass weights ÷ (Pass weights + Fail weights) × 100
Exclude N/A items. For example, if passed checks total 48 weight points and failed checks total 12, the score is 80%. This is an illustrative calculation, not a customer result or a suggested pass threshold.
Because the calculation uses completed Pass and Fail results, unanswered checks can make a partial audit look stronger than it is. Confirm that every applicable check has a result before comparing scores. Track the number of unanswered checks separately.
Also review the actual failures. An expired campaign sign or a blocked route needs a specific response even when the overall score is high. Define which failures prevent campaign approval rather than relying on an average alone.
When a store fixes a finding, retain the original audit result and record the correction and review separately. That preserves the difference between “right at the first check” and “fixed after feedback.”
Turn a failed check into a verified correction
A finding should tell the store what to change and the reviewer what evidence will close it. “Improve mannequin” leaves too much open to interpretation.
Here is an illustrative correction record:
| Field | Example |
|---|---|
| Store and zone | Store 12, entrance mannequin |
| Required standard | Campaign brief v3: blue jacket, cream trousers, approved footwear |
| Finding | Mannequin still wears the previous campaign’s black jacket |
| Owner and deadline | Shift lead; before the campaign’s agreed opening time |
| Correction and evidence | Replace the jacket; submit a full-outfit photo from the original angle |
| Closure | VM reviewer checks the new photo against brief v3 and records approval or further feedback |
Treat correction, submission, and approval as separate steps in your process. If the approved jacket is missing, record that dependency and obtain an authorized alternative. Do not ask the store to mark the original instruction complete with a different look and no explanation.
In Bitreport’s visual merchandising workflow, a reviewer can mark up a submitted photo and send written feedback to the store. The store sees the feedback in real time and repeats the correction-and-review loop until the display passes. This is manual review, not AI image recognition.
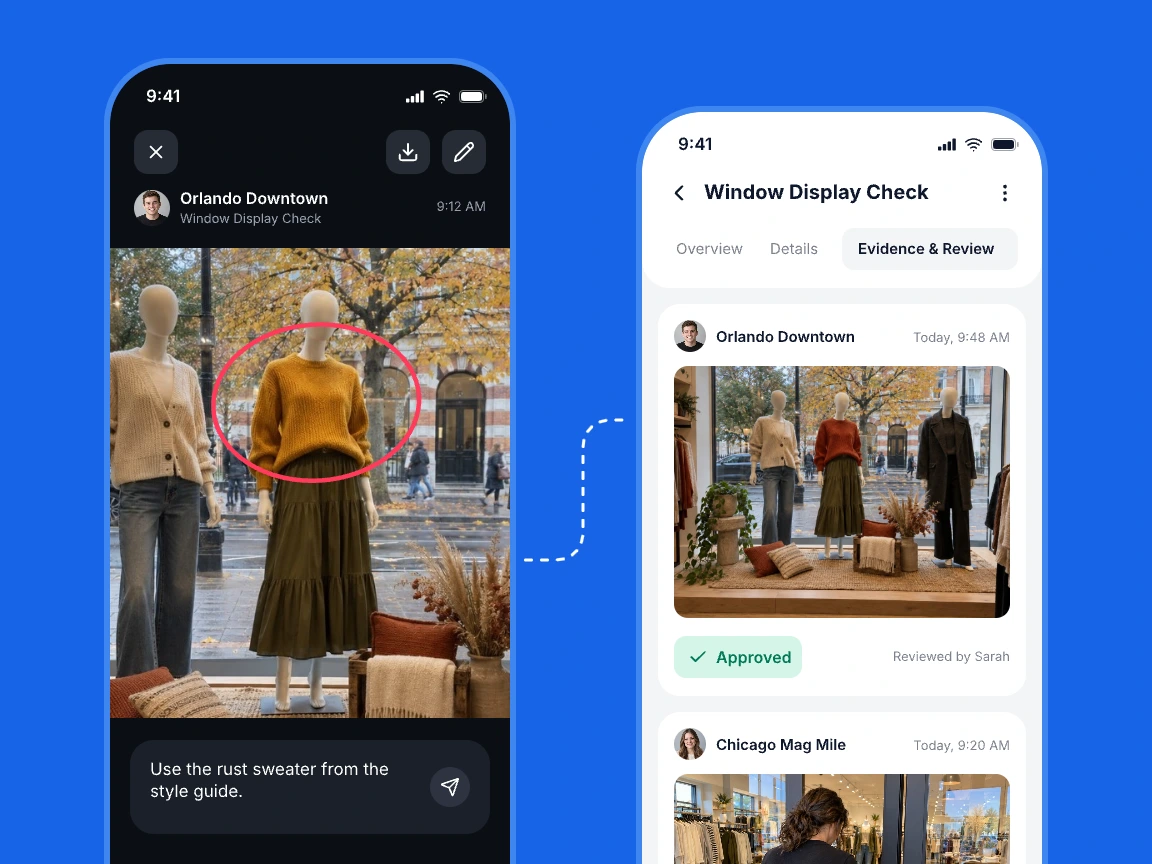
The published Under Armour CEE case study describes this weekly photo-review process across 22 stores. It reports around 45 minutes saved per store each week on VM work. That is a result reported for the regional implementation, not an expected saving for every store.
Decide when to run the checks
Use the audit at points where presentation can change, rather than treating every check as a daily task. The following is a starting cadence to adapt, not a universal frequency standard.
| Moment | Recommended scope | Follow-up |
|---|---|---|
| Before a campaign launch | Full relevant checklist against the new brief | Correct launch-critical findings and confirm approval before the agreed launch time |
| Daily opening or recovery | Short check of key displays, signs, gaps, and visible damage | Assign immediate fixes and record unresolved dependencies |
| Scheduled VM review | Consistent photo views and the applicable presentation checks | Compare the same zones, give specific feedback, and verify corrections |
| After a fixture move or major replenishment | Recheck affected areas | Confirm the display still matches the brief |
Who performs the walk and who approves it should be explicit. A store manager can complete the local check, while a VM specialist reviews brand-sensitive presentation. An area manager can investigate recurring gaps during the next visit.
For a broader visit record, use the store visit report guide. Keep the VM audit focused enough that teams can finish it and act on its findings.
Start with one campaign and calibrate the review
Try the checklist in a small selection of different store formats before applying it across the network. Ask two reviewers to assess the same display independently. Where they disagree, improve the reference photo or wording before treating scores as comparable.
Look for repeated causes as well as repeated failures. If several stores lack the same sign, the next action may sit with campaign distribution. If one instruction produces different layouts, the brief may need clarification. Store teams should own the work within their control, while head office resolves shared dependencies.
Get the free PDF or request the editable Excel checklist to adapt the checks and weights. If your challenge is managing photo feedback and corrections across locations, book a Bitreport demo using one real campaign brief and a typical display correction.